“Ns-2 began as a revision of ns-1. From 1997 to 2000, ns development was supported by DARPA through the VINT project at LBL, Xerox PARC, UCB, and USC/ISI. “[1]. Even though there is no official development activity now on ns-2, still a lot of students and research scholars using ns-2 for their projects and research works. People still use ns-2 because of the rich availability of several protocols and applications that are implemented to cover a lot of research areas of the Network.
Originally, ns-2 was developed on decade-old Linux systems that used very old versions of GCC compiler and other related libraries. Installing such an old version of GCC and other dependency libraries under the latest Linux variants is a risky thing because it will lead to “broken packages” in the system and may affect the stability of the system. Further, such manual installation of very old software on a new Linux system may lead to the failure of the existing application that is already installed in the system.
Even though we can use a type-II virtualization solution such as VirtualBox to install a suitable version of Linux (preferably equal to less than Ubuntu 16.04) or even Cygwin like Linux emulators under windows to install ns-2. But every such solution is having its consequences.
This article shows an elegant solution for installing the ns-2 on whatever the latest Linux operating system that you are using now.
Problems that we face during installing ns-2 under Native and Virtual Hardware/OS:
The most common issues that we may face under native hardware are:
- The Unix/Linux variant operating system(host OS) that is previously installed in the native hardware will not support or will not have the necessary version of GCC and other dependent packages that are needed to compile ns2 and nam or even other dependency packages successfully.
- Further, if we try to install the necessary version of GCC and other dependent packages under the host operating system, then it may raise some package conflicts so that some of the software that is previously installed in the system may fail to work.
The most common issues that we may face under type II hypervisors are:
- Generally, the virtual hardware (under VirtualBox or VMWare or Microsoft Virtual PC) will not have sufficient memory (RAM); so that the software that are requiring high memory and disk i/o will run with poor performance in terms of speed under virtualization.
- Generally, the installation process (or compile process) of ns2-35 or any ns-3 version will consume a lot of CPU power and resources. So that, the compile process will perform very poor under normal type II virtualization.
Chroot based Virtualization
According to Wikipedia “A chroot on Unix operating systems is an operation that changes the apparent root directory for the current running process and its children. A program that is run in such a modified environment cannot name (and therefore normally cannot access) files outside the designated directory tree. The modified environment is called a chroot jail.”
Keep in mind that the OS environment virtualized in chroot jail will only use the kernel of the host operating system. Since every ‘self-contained’ kernel doesn’t depend on the standard C library or any other library, installing any software under chroot will only depend on the libraries that we instal inside the chroot environment. Technically, in a chroot environment, we will use an old Linux variant with a new kernel (or even an elder kernel).
So, using this amazing chroot facility, we can easily install any guest UNIX/Linux variant under a host operating system and install/compile any software without disturbing the packages and software that are installed on the guest OS.
It is a classical and brilliant way of virtualization.
Advantages of installing ns-2 Under Chroot Jail Based Virtualization.
- It is possible to install any version of ns-2 on any version of Linux host, whether it is a new or old version(we only need to install the necessary Linux version in the chroot jail that is suitable for the version of ns3 that we are going to install)
- Installing dependency packages under chroot jail will not collapse the package integrity of the HOST OS. So our installation will not end as a nightmare or a clashed Linux system at any level.
- Unlike in other Type II hypervisors, we will get native CPU speed during the ns-2 compile process and during running a simulation.
- Unlike in other Type II hypervisors, the compile process will have access to all the real physical CPUs and the whole installed RAM in the system.
- Unlike in other Type II hypervisors, the compile process will have the native speed of accessing the system hard drives, and it will also boost the overall compile and run process.
- Most among all, if the path of “chroot jail’ is kept in a separate drive or volume, and if the HOST OS installed in the system will crash/fail in future for some other reason, and we need to reinstall it again, then the new installation will not at all affect anything that we did in chroot jail. So that, after the reinstallation of the host OS, our ns-2 installation residing in chroot jail will be instantly available for our use.
Installation of Debian 6 Squeeze (64 bit) on chroot Jail Environment under Debian 11
The Installation Requirements of chroot jail environment in Host
- Any low or high version of Unix/Linux desktop Host OS installation ( we need not worry about the version of GCC and other libraries installed in the Host OS)
- binutils and debootstrap package
Note: I used Debian 11 as the host OS. But, technically/theoretically it is possible to use any lower version of Debian Host or even any other lower version of Linux/Unix variant as HOST OS.
Installation of chroot Jail
Step 1: Install the dependencies
Step 2: Create a directory for holding the root file system (of the guest OS -Debian 10). Here I am creating a folder “Debian10Squeeze” under a partition that is mounted under /mnt/Virtual.
$ mkdir Debian6SqueezeAMD64
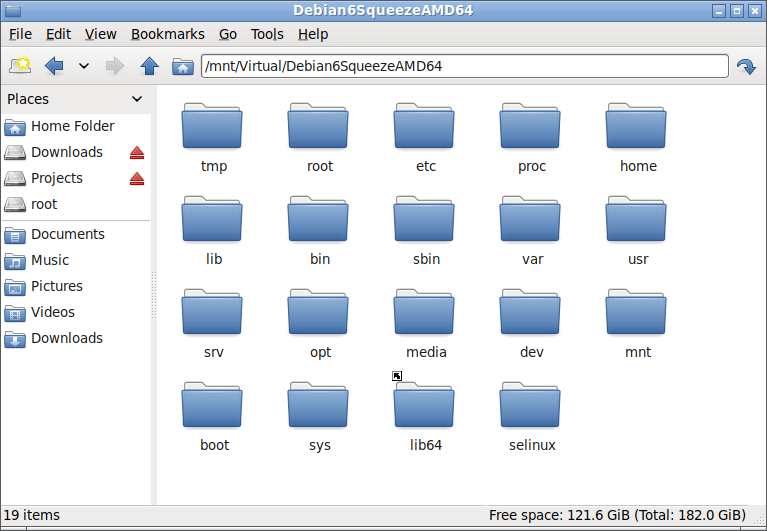
Step 3: Download the entire directory structure of 64 bit Debian 6 (Squeeze) Linux under the folder Debian6SqueezeAMD64 using debootstrap command
The following image shows the downloaded root directory structure of Debian 6 under the mounted file system of Host OS Debian 11
Step 4: Starting the ‘chroot jail’ terminal
# export display environment of host OS for running GUI application of chroot (guest) using the host OS’s windowing system.
$ export DISPLAY=:0.0
$ xhost +
# Enter into chroot jail
$ cd /mnt/Virtual
$ sudo chroot ./Debian6SqueezeAMD64
The above command opens the terminal of chroot jail Environment.
The following terminal output shows the root (/) of the chroot jail.
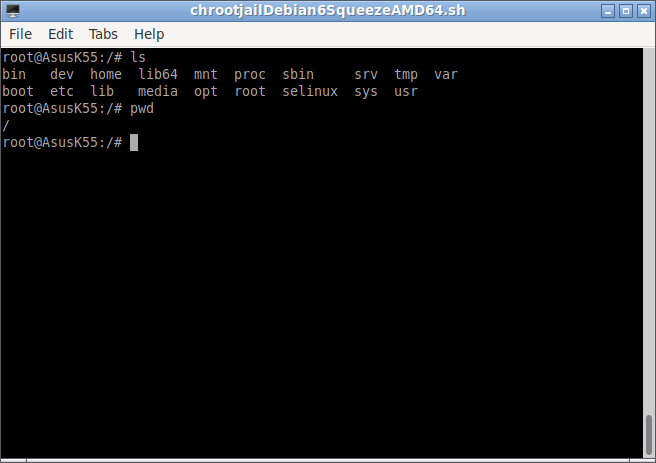
So the above terminal is a root (/) file system of the Debian 10 Squeeze which is under chroot jail.
From this terminal, we can not access the root file system of the Debian 11 host. So we can safely do all our installations and experiments under this chroot jail.
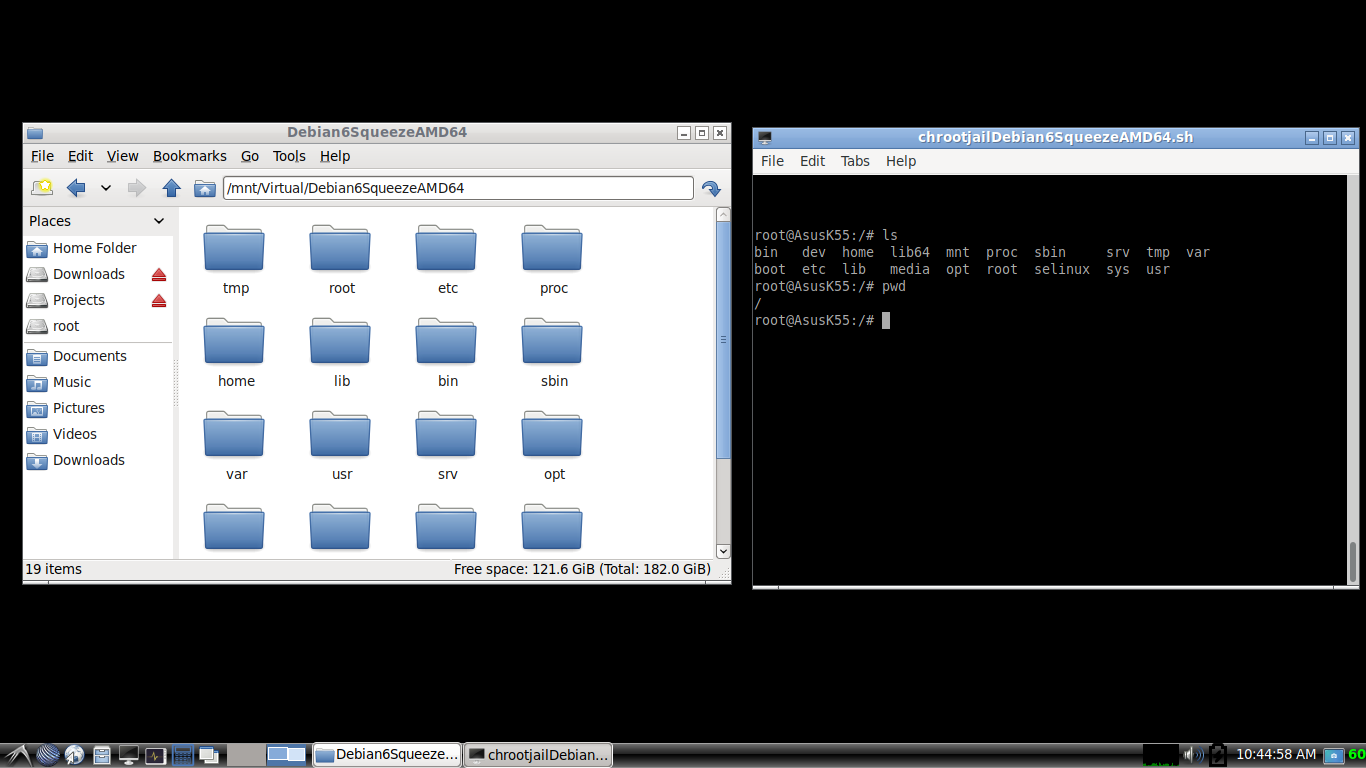
The following is the view from the host OS’s desktop. Here the left side file explorer shows the absolute path of the chrooted folder. But the right-side terminal shows the same location under restricted chroot jail.
Installation of ns-2 Under Chroot Jail
Step 6: Install the necessary dependencies of ns-2
# refresh the database of available packages
$ apt-get update
#install the dependencies
$ apt-get install perl xgraph libxt-dev libx11-dev libxmu-dev
$ apt-get install gcc-4.4 cpp-4.4 gcc-4.4 gcc-4.4-base
#(Install any other GCC version if your project is requiring it)
Step 7: Download ns2.35 from the following link
# copy the download ns-allinone-2.35.tar.gz file to the home directory
$ cd /home
$ tar -xvf ./ns-allinone-2.35.tar.gz
#or extract the compressed file using your own method
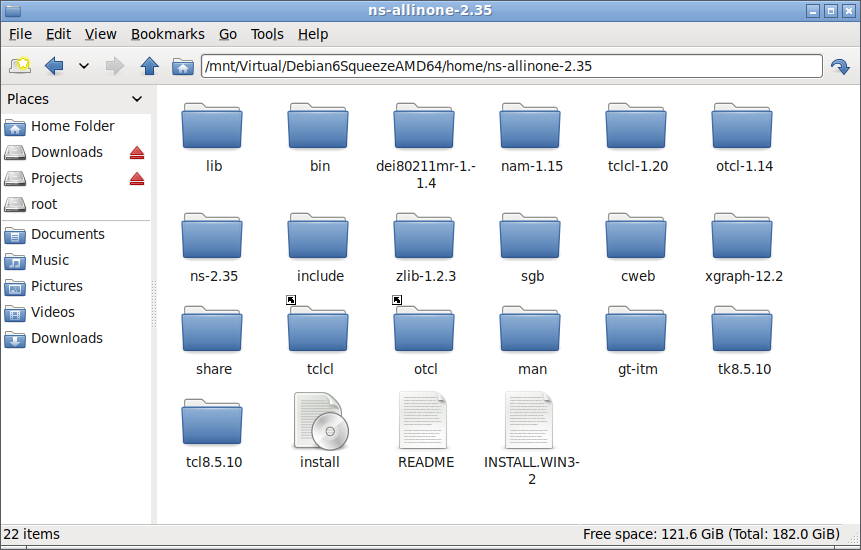
In this tutorial, I will extract the directory structure of ns-allinone-2.35under the folder /home/ns-allinone-2.35 (under the virtual Debian 6 guest)
The following output shows the absolute path of ns-allinone-2.35 installation from file explorer that was running under the host OS (Debian 11)
Step 8: Installing ns-allinone-2.35
#Installing ns-allinone-2.35
$ cd /home/ns-allinone-2.35/
#Run the main installation script (that will compile and install everything)
$ ./install

The following terminal outputs at the end of the installation process will show the things that we need to do in the startup script .bashrc of .profile that we can find the home directory of the user.
Ns-allinone package has been installed successfully.
Here are the installation places:
tcl8.5.10: /home/ns-allinone-2.35/{bin,include,lib}
tk8.5.10: /home/ns-allinone-2.35/{bin,include,lib}
otcl: /home/ns-allinone-2.35/otcl-1.14
tclcl: /home/ns-allinone-2.35/tclcl-1.20
ns: /home/ns-allinone-2.35/ns-2.35/ns
nam: /home/ns-allinone-2.35/nam-1.15/nam
xgraph: /home/ns-allinone-2.35/xgraph-12.2
gt-itm: /home/ns-allinone-2.35/itm, edriver, sgb2alt, sgb2ns, sgb2comns, sgb2hierns
———————————————————————————-
Please put /home/ns-allinone-2.35/bin:/home/ns-allinone-2.35/tcl8.5.10/unix:/home/ns-allinone-2.35/tk8.5.10/unix
into your PATH environment; so that you’ll be able to run itm/tclsh/wish/xgraph.
IMPORTANT NOTICES:
(1) You MUST put /home/ns-allinone-2.35/otcl-1.14, /home/ns-allinone-2.35/lib,
into your LD_LIBRARY_PATH environment variable.
If it complains about X libraries, add path to your X libraries
into LD_LIBRARY_PATH.
If you are using csh, you can set it like:
setenv LD_LIBRARY_PATH
If you are using sh, you can set it like:
export LD_LIBRARY_PATH=
(2) You MUST put /home/ns-allinone-2.35/tcl8.5.10/library into your TCL_LIBRARY environmental
variable. Otherwise ns/nam will complain during startup.
After these steps, you can now run the ns validation suite with
cd ns-2.35; ./validate
For trouble shooting, please first read ns problems page
http://www.isi.edu/nsnam/ns/ns-problems.html. Also search the ns mailing list archive
for related posts.
So you have to add the necessary lines in the startup script so that the commands ns, nam and exgraph can be executed within any folder of the system.
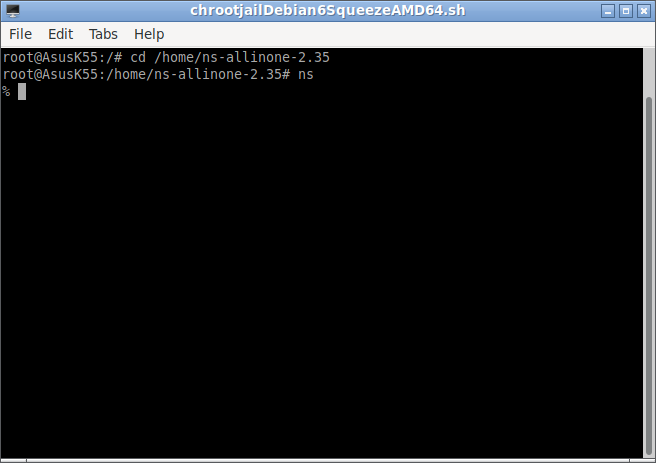
Testing the Installation
#path of ns binary correctly in the startup script before running ns
$ ns
%
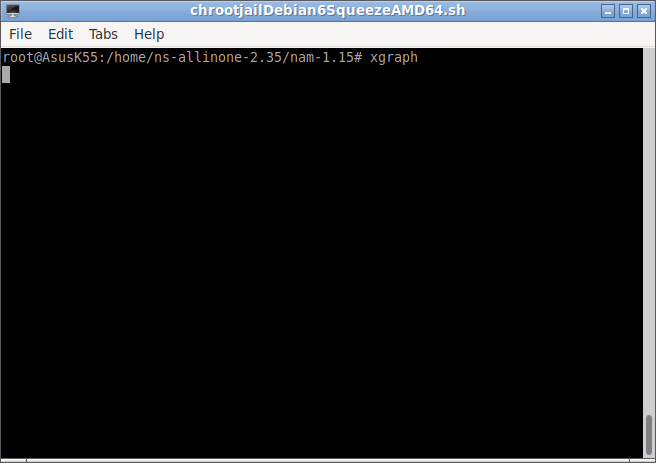
$ xgraph
_
#Testing name with some example simulation
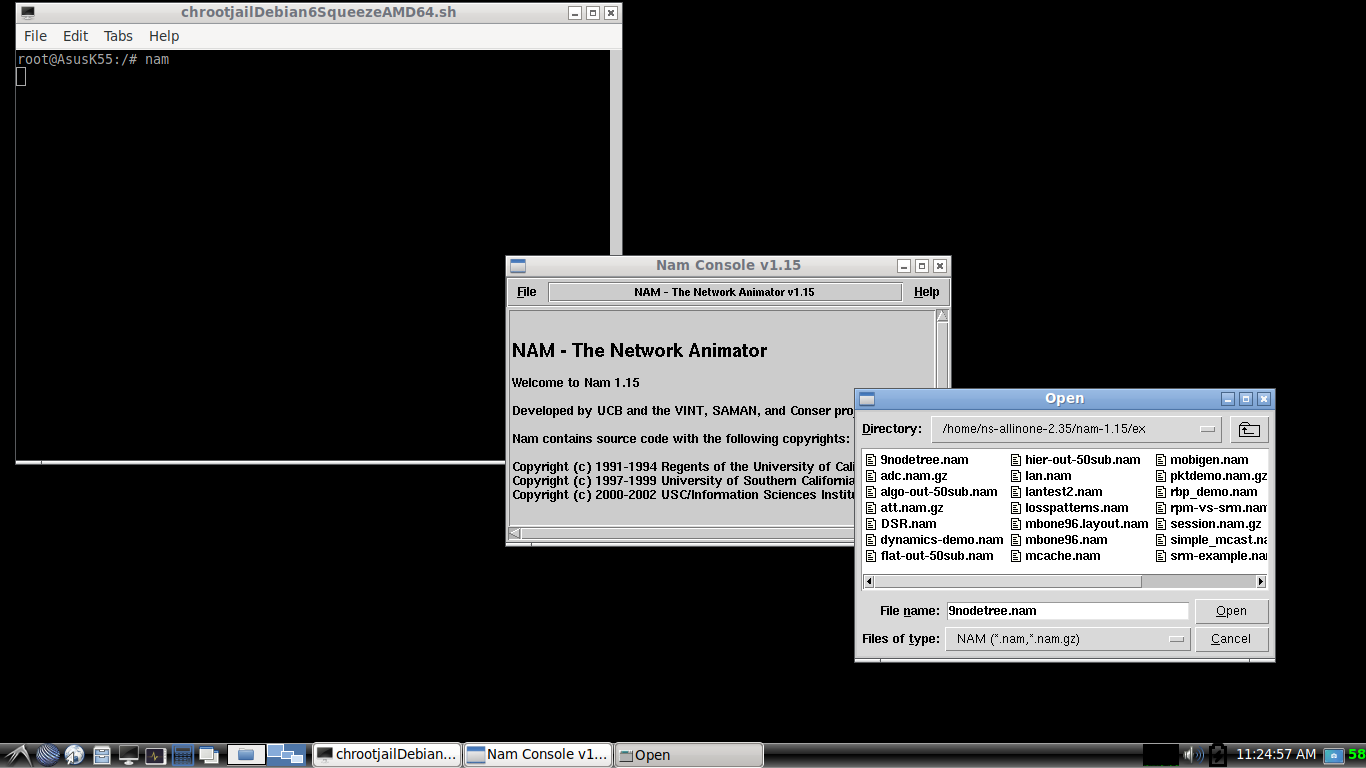
$ nam
The above command will open the main GUI of name. From that, we can open the name trace output of any previous simulation and animate/visualize it on nam
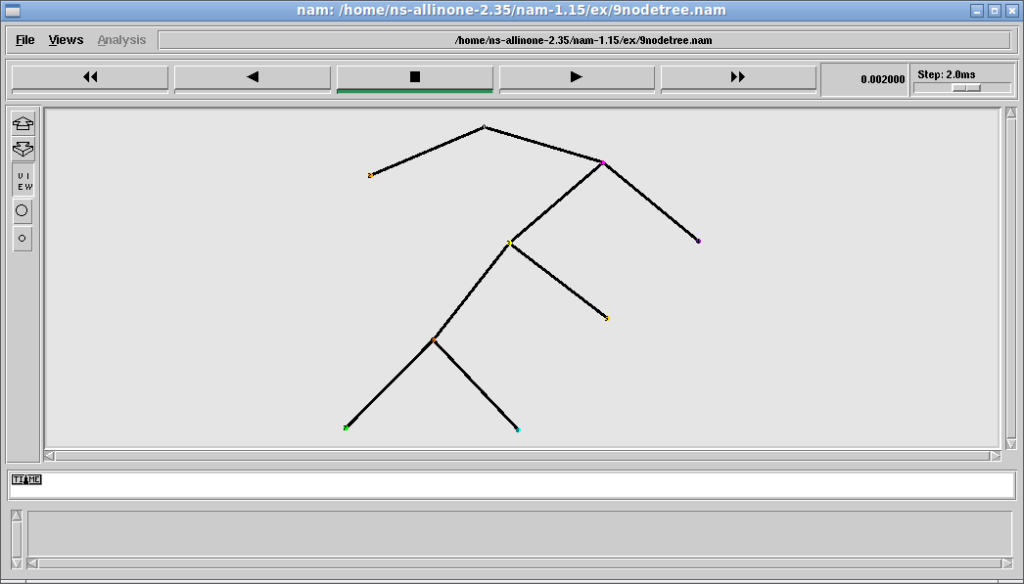
The following is the output of the simulation (9nodetree.nam) that was opened with nam. (there are many such simulations available under the ex folder).
Final Note :
We have to keep in mind that the nam is actually running in Debian 6(chrooted Guest OS) and only just showing its output on Debian 11’s (Host OS) windowing system. The important thing we have to understand here is, the application which is running under chroot jail environment will get the native or near-native performance of the Host OS and Host hardware. So, we are getting the native software and hardware performance under this unique virtualization technology. So that the ns-2 compile process and simulations also gets accelerated and get near-native software and hardware performance.
Important: If you face any issues or errors while running nam GUI under chroot, then you have to mount the /proc and /dev file systems of the host under the root / of chroot (mount -t proc /proc proc/) before entering into chroot jail. We have to export the Host Display before entering into the chroot jail
Some Examples of “Chroot Jail” based Simulations
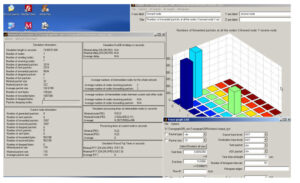
In the following articles, you may find some of the simulations that I did under chroot jail. Please note the excellent performance of these GUI based 3D simulations. In fact, these simulations are actually running under chroot jail but the GUI 3D outputs are rendered in the Host Disply’s windowing system. So that these simulations are getting the native 3D performance. One will never get such a level of performance under any other kind of virtualization like “VirtualBox”.
Simulations using chrooted Debian 10 Squeeze AMD64 (Under Debian 11 Host)
- Simulating And Visualizing 3D Mobile Underwater Sensor Network (UWSN) Under ns-3
- Simulating And Visualizing 3D Aerial Ad-hoc Network (AANET) and Flying Ad-hoc Network (FANET) Under ns-3
- Simulation of Multi-Tire UAV/AANET/FANET Topology Using Gauss-Markov 3D Mobility Model Under ns-3
- Using Gauss-Markov 3D Mobility Model Under ns-3 for Simulating Unmanned Aerial Vehicle (UAV), Aerial Ad-hoc Network (AANET) and Flying Ad-hoc Network (FANET)
Simulations using chrooted Debian 9 Stretch AMD64 (Under Debian 11 Host)
- Simulating And Visualizing 3D Flying Ad-hoc Network (FANET) Under Omnet++
- Simulating and Visualizing 3D Underwater Wireless Sensor Network (UWSN) Under Omnet++
- Installing NetSimulyzer 3D Visualization Tool under Debian/Ubuntu
- Installing NetSimulyzer 3D Visualization Support Add-on Module in ns-3 under Debian/Ubuntu
 Take Me to Afarion ns-3 iPlayground