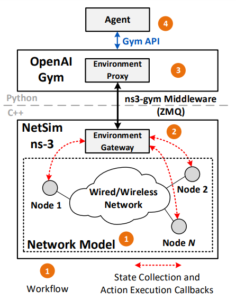
 ns3-gym is the first framework for RL research in networking[4]. It is based on OpenAI Gym, a toolkit for RL research and ns-3 network simulator. Specifically, it allows representing an ns-3 simulation as an environment in Gym framework and exposing state and control knobs of entities from the simulation for the agent’s learning purposes. This framework is generic and can be used in various networking problems. The toolkit is provided to the community as open-source under a GPL license. The right-side figure from [4] shows the architecture of ns3-gym framework. One may refer [4] for more details about this architecture and its implementation uner ns-3.
In simple terms, ‘ns3-gym Model’ provides a way to communicate with a simple reinforcement learning algorithm framework from an ns-3 simulation.
In this article, we will see the installation procedure for installing ‘ns3-gym Model’ under Debian 10 “Buster” chroot jail.
ns3-gym
Gym[1] is a toolkit for developing and comparing reinforcement learning algorithms. ns3-gym is a framework that integrates OpenAI Gym with ns-3 for doing AI/RL based simulations under ns-3.
Install ns3-gym
ns3-gym model is originally integrated with a old ns3-dev version and available along with that ns3-dev version at GitHub. So we o not need to worry bout installing a particular ns-3 version for ns3-gym. We just need to download/clone the entire project and recompile it on our system.
You may follow the ns-3 dependency installation procedure given here as per your requirements.
Or you may simply follow the originl procedure from [3] for the installation of ns3-gym.
Change to “your home” folder
Clone the ns3-gym repository under your home folder
We need the dependencies libzmq5, libzmq5-dev, libprotobuf-dev and protobuf-compiler for ns3-gym. We may install the last two in the list as follows:
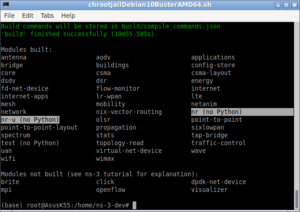
$ ./waf configure

Configure Python interface for ns3-gym
Now configure the python interface as follows:
Testing the Installation with simple Simulation
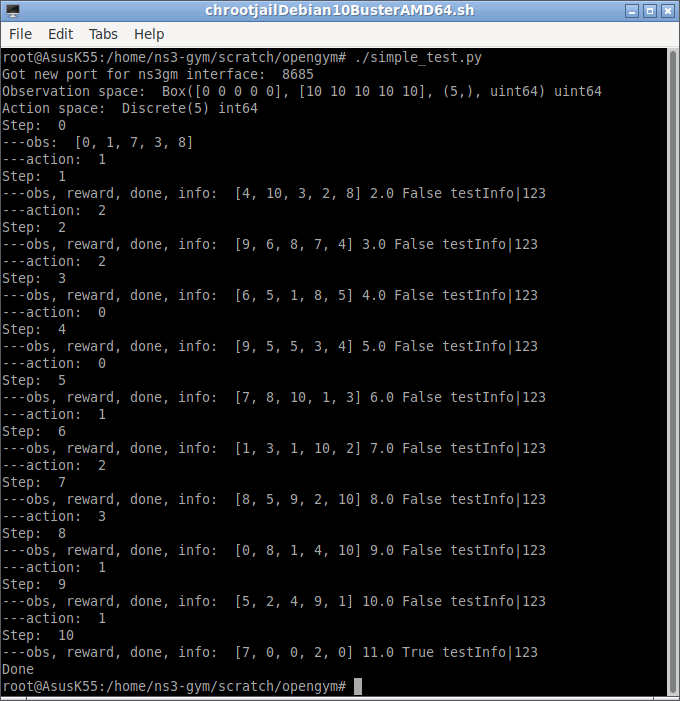
$ cd ./scratch/opengym
$ ./simple_test.py
Running the Same, Simple test With two terminals
At Terminal 1 : Since we are doing this simulation under chroot, we start another terminal from the first terminal by running xterm command in the background. ($ xterm & ). After that, we have to run the following at the new xterm.
$ cd /home/your_name/ns3-gym
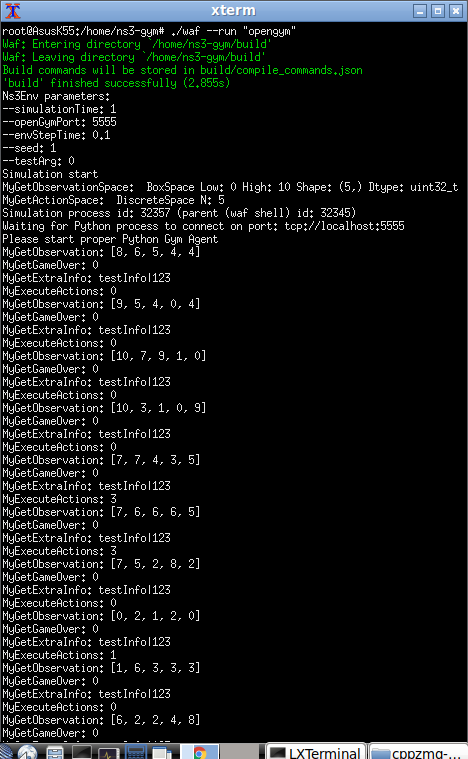
$ ./waf –run “opengym”
The above will create the following output after running the simulation from another terminal.
At Terminal 2 : This is main chroot terminal from which the above xterm was run at background(&). We have to issue the following command in this terminal.
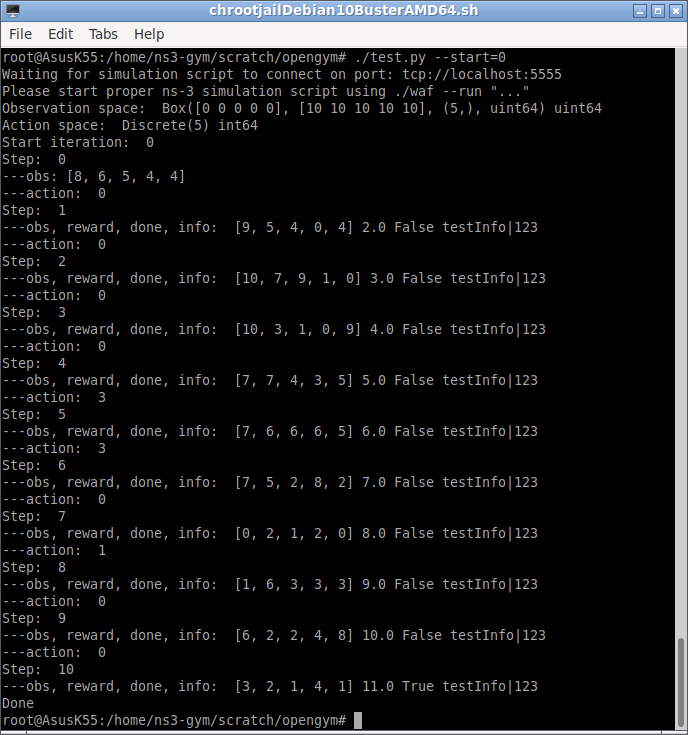
$ cd /home/your_name/ns3-gym/scratch/opengym
$ ./test.py –start=0
Running the Example of RL-based TCP Congestion Control Algorithm
Running it in a Single Terminal
We may run the tl-rcp example in single terminal as follows:
$ cd /home/your_name/ns3-gym/scratch/rl-tcp
$ ./test_tcp.py
Running it in Two Separate Terminal
For a better understanding of ns-3 simulation and Gym interactions, we can run the rl-tcp example in two separate window as follows:
At Terminal 1 : Since we are doing this simulation under chroot, we start another terminal from the first terminal by running xterm command in the background. ($ xterm & ). After that, we have to run the following at the new xterm.
$ cd /home/your_name/ns3-gym/
$ ./waf –run “rl-tcp –transport_prot=TcpRl”
This will start one part of the simulation. The following is the initial output at the terminal:
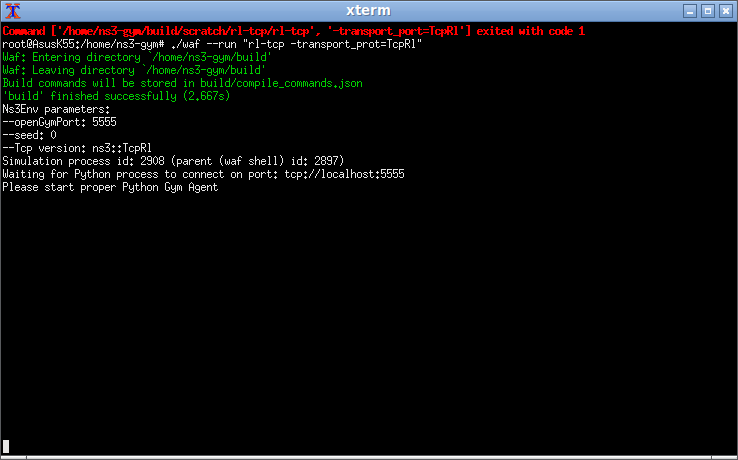
This tells us that to start the python gym agent. (we have to start if from terminal 2 as explained in the next step)
At Terminal 2 : This is main chroot terminal from which the above xterm was run at background(&). We have to issue the following command in this terminal.
$ cd /home/your_name/ns3-gym/scratch/rl-tcp/
$ ./test_tcp.py –start=0
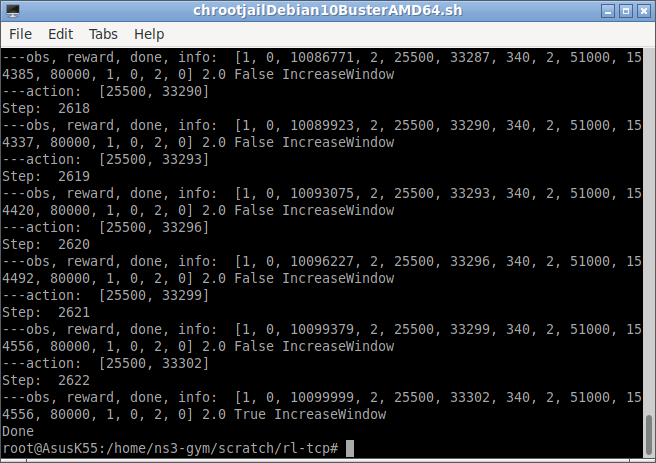
The above command will start communication with the terminal 1 process and produce the following output in terminal 2.

Similarly, The above command will produce the following output in terminal 1 also:
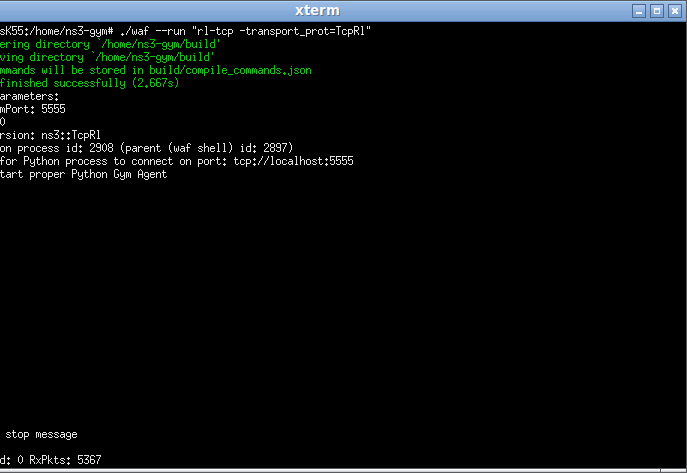
As shown in the above terminal 1 output, it shows the total receive packet “RxPkts” at the end of the simulation.
 Take Me to Afarion ns-3 iPlayground