Constituents of an ns-3 Simulation Script.

ns-3 provides support for very detailed simulation of different kinds of network-related problems and has a lot of features for simulation, analysis, and visualization. So, a typical ns-3 simulation code may be a little bit confusing for a beginner. To understand an ns-3 simulation script, we have to be familiar with most of the possible Constituent parts of an ns-3 Simulation Script.
Generally, an ns-3 Simulation script may contain sections or lines of code corresponding to the following:
- Few lines of code to Include necessary header files.
- Defining log component corresponding to our simulation (this script)
- Line(s) of code to specify the Namespace.
- Few lines of code to declare and initialize a few local variables if any (if needed).
- Few lines of code for configuring Simulation defaults if any(if needed).
- Few lines of code for command-line argument handling to override the default values if any(if needed).
- One line of code for Setting simulation time resolution(Optional).
- Few lines of code for Enabling logging for different modules(Optional).
- Lines of code for Creating nodes.
- Few lines of code for Create net devices with MAC and PHY.
- Few lines of code for Attaching the Net devices to nodes and setup the interconnections.
- Few lines of code for setting up Some Applications/Traffic.
- Few lines of code for defining a mobility model (if the network nodes needing it)
- Few lines of code for setting up ASCII trace (like ns2 event trace- optional).
- Few lines of code for setting PCAP/TCPDUMP format trace (that can be used to for analysis using Wireshark like tools).
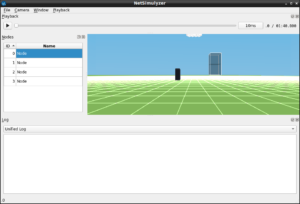
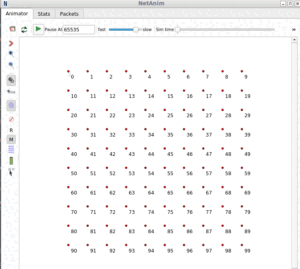
- Few lines of code for Creating the animation object and configure the specified output for XML trace to visualize the scenario in NetAnim (optional, NAM-like trace).
- A line of code to Stop, Run and Destroy the Simulator.
- Few lines of code for setting up a network monitoring framework FlowMonitor to do some trace Analysis(optional).
(Note: Some of the above sections of code may use containers and helper functions for minimizing some attribute setup on some network or protocol entities).
Of course, a simple network simulation script will not contain or need not require all these sections of code.
Steps in a Simple ns-3 Simulation
If we are only want to see some textual log outputs of ” log component” of different modules of the ns-3, then we can follow only the following steps in the simulation script:
- Few lines of code to Include necessary header files.
- Line(s) of code to specify the Namespace.
- Lines of code for Creating nodes.
- Few lines of code for Create net devices with MAC and PHY.
- Few lines of code for Attaching the Net devices to nodes and setup the interconnections.
- Few lines of code for setting up Some Applications/Traffic.
- Line(s) of code to Stop, Run and Destroy the Simulator.
So, for example, if we write a simulation script only using the above set of components, then we may use the trace outputs of the log components to analyze the simulation behaviour and outputs.
The log components can be enabled by setting the environment variable before running the script.
For example, if we used UDP application in our simulation, and want to see the log info events belongs to the UdpEchoServerApplication, then you have to set the environment variable NS_LOG as follows:
$ export NS_LOG=UdpEchoClientApplication=level_info:UdpEchoServerApplication=level_info
and then run the simulation, it will start to display the info log of UdpEchoClientApplication as well as the info log of UdpEchoServerApplication in the terminal window.
Read more about this kind of simulation from the following article.
Steps in a Simple ns-3 Simulation with Ascii Trace Support
If we are only want to do extensive trace analysis on the behaviour of different modules of the ns-3, then we may do it by enabling ASCII trace support of ns3 by writing a simulation script with the following steps:
- Few lines of code to Include necessary header files.
- Line(s) of code to specify the Namespace.
- Lines of code for Creating nodes.
- Few lines of code for Create net devices with MAC and PHY.
- Few lines of code for Attaching the Net devices to nodes and setup the interconnections.
- Few lines of code for setting up Some Applications/Traffic.
- Few lines of code for setting up ASCII trace (like ns2 event trace- optional).
- Line(s) of code to Stop, Run and Destroy the Simulator.
Read more about this kind of simulation from the following article
Steps in a Simple ns-3 Simulation for Visualization with NetAnim
If we are only want to do a simple simulation and only want to see visualize the output for some demonstrative purpose, then we may add the XML trace support of ns3 by writing a simulation script with the following steps:
- Few lines of code to Include necessary header files.
- Line(s) of code to specify the Namespace.
- Lines of code for Creating nodes.
- Few lines of code for Create net devices with MAC and PHY.
- Few lines of code for Attaching the Net devices to nodes and setup the interconnections.
- Few lines of code for setting up Some Applications/Traffic.
- Line(s) of code to Stop, Run and Destroy the Simulator.
Read more about this kind of simulation from the following article

 Discuss Through WhatsApp