Doing a Simple Simulation From “Scratch”
The following script “SimpleNS3Simulation1.cc” is a simple point-to-point example.
In fact, this simple example simulation is created from the sample script first.cc which will be available along with ns-3 installation.
SimpleNS3Simulation1.cc
#include "ns3/core-module.h"
#include "ns3/network-module.h"
#include "ns3/point-to-point-module.h"
#include "ns3/internet-module.h"
#include "ns3/applications-module.h"
using namespace ns3;
int main (int argc, char *argv[])
{
NodeContainer nodes;
nodes.Create (2);
PointToPointHelper channel;
channel.SetDeviceAttribute ("DataRate", StringValue ("5Mbps"));
channel.SetChannelAttribute ("Delay", StringValue ("2ms"));

NetDeviceContainer netDevices;
netDevices = channel.Install (nodes);

InternetStackHelper ipStack;
ipStack.Install (nodes);

Ipv4AddressHelper ipAddresses;
ipAddresses.SetBase ("192.168.1.0", "255.255.255.0");

Ipv4InterfaceContainer ipinterfaces = ipAddresses.Assign (netDevices);

UdpEchoServerHelper udpEchoServer (9);

ApplicationContainer serverApps = udpEchoServer.Install (nodes.Get (1));
serverApps.Start (Seconds (1.0));

UdpEchoClientHelper udpEchoClient (ipinterfaces.GetAddress (1), 9);

ApplicationContainer clientApps = udpEchoClient.Install (nodes.Get (0));
clientApps.Start (Seconds (2.0));

Simulator::Run ();
}
just removed some of the lines from that original example to simplify it for better understanding. Further, I modified some of the variable names for better understanding (I removed some of the lines from the original script – Latter, I will explain the reason in another Article).
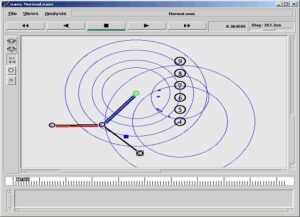
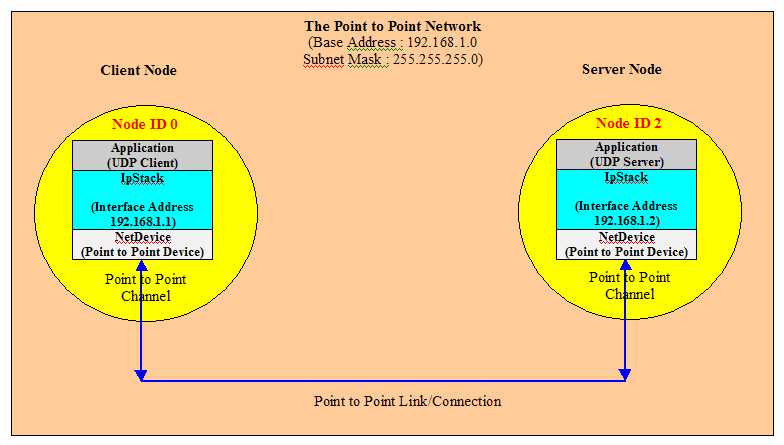
Let us try to visualize the simple point-to-point network scenario that we created and simulate under ns-3. The following diagram may give you some sort of mental picture of the integrity of the different entities involved in the above simulation.
Running the Script “SimpleNS3Simulation1.cc”
If you run the script, it will not generate any interesting outputs in the terminal; because I just removed all the lines which actually shows some “LogComponent” outputs to make you understand how we can use the Log Components in a typical simulation. There is no need to enable the Log Components in the simulation script itself – later we may enable it by setting the environment variable before running the simulation.
Download the file “SimpleNS3Simulation1.cc” and copy it to the folder ns-allinone-3.25/ns-3.25/scratch
Change to the directory “ns-3.25”
$ cd ns-allinone-3.25/ns-3.25/
And run the simulation
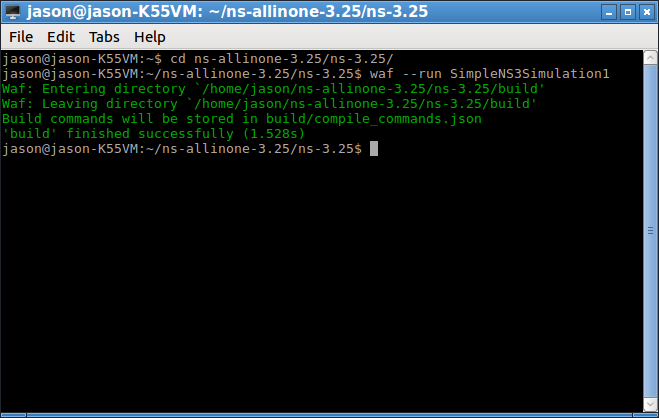
$ waf –run SimpleNS3Simulation1
After running the simulation, you will not see any interesting output; because didn’t enable any log components in the script. Your terminal window may just show the following:
Enabling Log components
Log components may be enabled by adding a few lines in the simulation script or by simply setting appropriate environment variables in the command prompt itself. In this example, we are going to enable the log components by setting appropriate environment variables. By doing this in this way, we can actually understand the message logging facility available in ns-3.
If we set the environment variable NS_LOG as follows,
$ export NS_LOG=UdpEchoClientApplication=level_info
and run the simulation again
$ waf –run SimpleNS3Simulation1
Now it will start to display the info log of UdpEchoClientApplication.
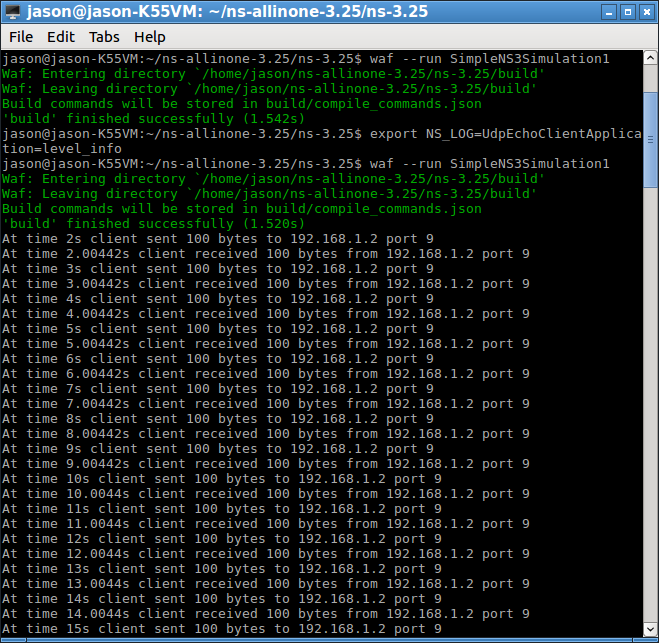
If you see the above output, then you may see only the “sending” and “receiving” events of the UdpEchoClientApplication. It will show events up to around 100 seconds. Because we are only using default attributes of the UdpEchoClientApplication so that it will send 1 echo request for each second and send 100 requests in total (the default values).
If you want to see the log info events belonging to the UdpEchoServerApplication, then you have to set the environment variable NS_LOG as follows:
$ export NS_LOG=UdpEchoClientApplication=level_info:UdpEchoServerApplication=level_info
and run the simulation again
$ waf –run SimpleNS3Simulation1
Now it will start to display the info log of UdpEchoClientApplication as well as the info log of UdpEchoServerApplication.
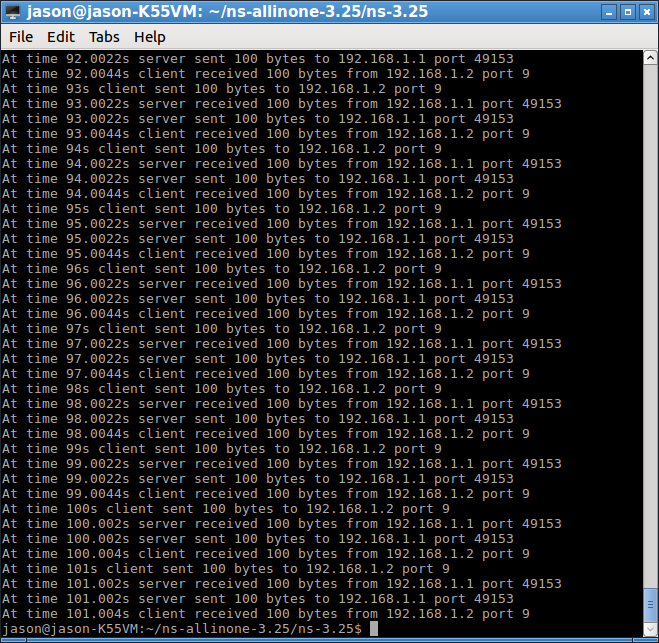
If you see the output now, you will notice the sending and receiving events of both the UDP echo client and server for up to around 100 seconds.
This kind of log is used to trace errors while developing a simulation.
But for doing trace analysis and visualization, we have to use other features available in ns3. We will see them in another article.
 Take Me to Afarion ns-3 iPlayground