Note: This article explains the installation of ns-3 on older systems. For installing ns-3 on the latest Linux Variants, you may follow the new procedure such as the below one.
Installing ns3.35 in Debian 10 chroot Jail Under Debian 11 Host OS or any Version of Linux Host
 In this tutorial, we are going to use the ns3 version ns-3.25 which was released on 24 March 2016.
That version of ns-3 was available for download from the following link.
https://www.nsnam.org/release/ns-allinone-3.25.tar.bz2
(We may get ns2 source code from different sources also)
According to the release notes, this ns3.25 version has been tested on the following platforms:
– Ubuntu 15.10 (64 bit) with g++-5.2.1
– Ubuntu 14.04 (64 bit) with g++-4.8.2
– Fedora Core 23 (64 bit) with g++-5.3.1
– Fedora Core 22 (32 bit) with g++-5.1.1
– Fedora Core 21 (64 bit) with g++-4.9.2
– Arch Linux (64 bit) with g++-5.3.0 and clang++-3.7.1
– CentOS/RHEL 6.7 (64-bit) with g++-4.4.7
– OS X El Capitan 10.11.4 with Xcode 7.3 and Apple LLVM version 7.3.0
– OS X El Capitan 10.11.3 with Xcode 7.2.1 and Apple LLVM version 7.0.2
– OS X Yosemite 10.10.5 with Xcode 7.2.1 and Apple LLVM version 7.0.2
– FreeBSD 10.2-RELEASE (64 bit) with clang-3.4.1
Hopefully, you can make it work on your Linux installation without any major trouble.
In this procedure, we will see how we can install ns3.25 on Lubuntu 16.04 LTS operating system.
Preparing Lubuntu (or Ubuntu) for ns-3 installation.
A fully functional ns3 development environment will need a lot of tools/packages/dependencies.
we can blindly install all of them just by giving a single command.
$ sudo apt-get install gcc g++ python python-dev qt4-dev-tools libqt4-dev mercurial bzr cmake libc6-dev libc6-dev-i386 g++-multilib gdb valgrind  gsl-bin libgsl0-dev libgsl0ldbl flex bison libfl-dev tcpdump sqlite sqlite3 libsqlite3-dev libxml2 libxml2-dev libgtk2.0-0 libgtk2.0-dev vtun lxc uncrustify doxygen graphviz imagemagick texlive texlive-extra-utils texlive-latex-extra texlive-font-utils texlive-lang-portuguese dvipng python-sphinx dia python-pygraphviz python-kiwi python-pygoocanvas libgoocanvas-dev ipython libboost-signals-dev libboost-filesystem-dev openmpi-bin openmpi-common openmpi-doc libopenmpi-dev

# But a normal ns3 user (a student or a scholar) will not need most of the components
# or functionalists for a simple simulation experiment. So we can avoid installing some of the above mentioned packages.
(see https://www.nsnam.org/wiki/Installation for a detailed explanation about the installation of these tools/packages/dependencies. needed for ns3 – you will see a detailed procedure for installing ns3 in some other operating system too)
Installing ns-3
1. Download ns-allinone-3.25 package from the following link (or from any other source)
https://www.nsnam.org/release/ns-allinone-3.25.tar.bz2
2. extract the tarball package in a folder (Preferably your home directory)
( If you have downloaded this in tarball from the above location, you will find some additional components along with ns-3. Those optional components are necessary to support some optional ns-3 features, such as Python bindings and the Network Animation.)
After extracting the file, you will have the following 4 folders under the folder ns-allinone-3.25
ns3.21
netanim-3.107
bake
pybindgen-0.17.0.post49+ng0e4e3bc
(To build/install all the components we may run the script build.py which will be available under the folder ns-allinone-3.25; It will automatically build all the components, plus ns-3 itself. But, for a successful build of ns3 and all the optional components, the necessary supporting packages and libraries should be present in the system. Otherwise, a particular component may fail to build. )
As a ns3 beginner, we (1) will attempt to do some ns3 simulation and
(2) will try to visualize it in network animation tool
(3) and then try to do some analysis on the simulation outputs if any.
For starting a simple simulation experiment, we will not need all those additional packages.
So, first, we may only install ns-3 and the network animation tool Netanim – it will be sufficient for most of the experiments.
3 Step for Directly installing ns-3 only
First, change to the ns-3 directory
$ cd ns-allinone-3.25/ns3.21
We may build it in different ways
a) by using ‘waf’ we may build ns3 as follows:
$ waf configure
(or )
$ waf configure –enable-examples –enable-tests
(this will configure waf to build some example and test scripts along with ns3)
$ waf
this will actually compile and built ns3 (and other example code)
(or)
b) we may use a dummy make script that will indirectly build ns3 using waf. (ns2 users may like this way)
$make configure
$make
4. Testing with some sample simulation ( if we built the samples using the command :$ waf configure –enable-examples –enable-tests )
$cd ns-allinone-3.25/ns3.21
$./waf –run examples/tutorial/first
Waf: Entering directory `/home/jason/ns-allinone-3.25/ns-3.25/build’
Waf: Leaving directory `/home/jason/ns-allinone-3.25/ns-3.25/build’
Build commands will be stored in build/compile_commands.json
‘build’ finished successfully (2.681s)
At time 2s client sent 1024 bytes to 10.1.1.2 port 9
At time 2.00369s server received 1024 bytes from 10.1.1.1 port 49153
At time 2.00369s server sent 1024 bytes to 10.1.1.1 port 49153
At time 2.00737s client received 1024 bytes from 10.1.1.2 port 9
If you see the outputs, then it means you have successfully installed ns-3 and build it with some sample simulations.
Now you may start exploring the simulation scripts that were available under ns-allinone-3.25/ns3.21/examples/tutorial/.
Installing the Network Animation tool “Netanim”
$cd ns-allinone-3.25/netanim-3.107
$make clean
$qmake NetAnim.pro (For MAC Users: qmake -spec macx-g++ NetAnim.pro)
$make
Now we may use the netanim tool for visualizing our network simulations.
Testing NetAnim with a given example simulation.
$cd ns-allinone-3.25
$ ./waf –run dumbbell-animation
Waf: Entering directory `/home/yourhome/ns-allinone-3.25/ns-3.25/build’
Waf: Leaving directory `/home/yourhome/ns-allinone-3.25/ns-3.25/build’
Build commands will be stored in build/compile_commands.json
‘build’ finished successfully (1.536s)
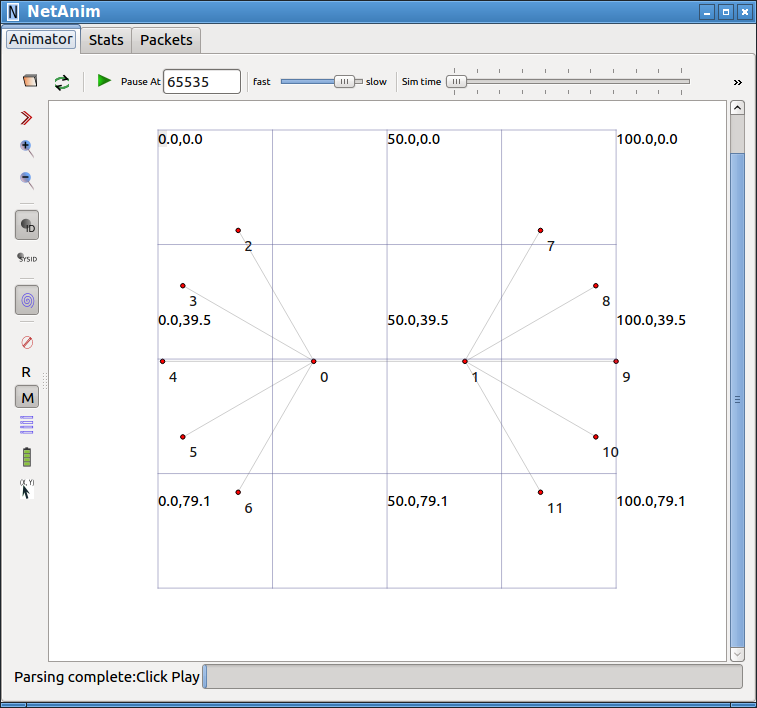
Animation Trace file created:dumbbell-animation.xml
Since we run the simulation from the folder ns-allinone-3.25, it will create the output file “dumbbell-animation.xml” inside that folder.
If you already set the path variable “NetAnim”, then you can start NetAnim from that folder itself
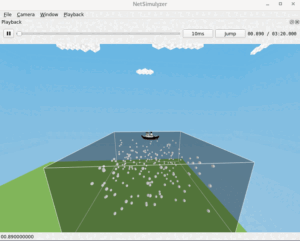
$ NetAnim
It will show the empty NetAnim window.
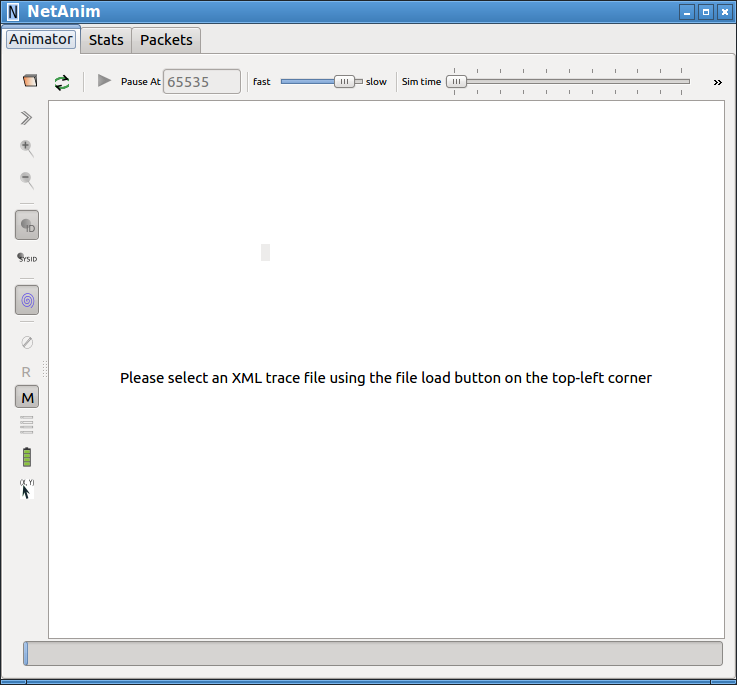
Now, open the “dumbbell-animation.xml” file by pressing the folder at the top left of the toolbar.
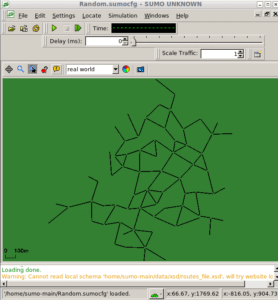
Now you can visualize the simulation by pressing the green play button.
You may start learning an ns3 script by following the post.
For installing the latest ns-3-dev version, one may follow the below procedure:
Installing ns-3-dev Under chroot Jail and Compile with CMake
See more :
 Take Me to Afarion ns-3 iPlayground