NetSimulyzer 3D Visualization Tool:
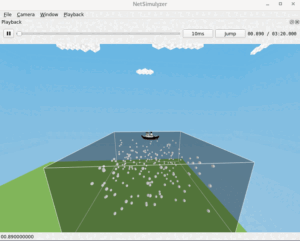
The NetSimulyzer 3D visualization tool can be used to play/animate/visualize ns-3 network scenarios for better understanding, presenting and debugging them.
While trying to install the NetSimulyzer 3D visualization tool on some of the latest versions of Linux variants such as Debian 11 and some latest Ubuntu versions, we may face some errors due to the unavailability of the package ‘qt5-default’.
We can not find package ‘qt5-default’ in the software repositories of the recent Linux variants (ex : Debian 11).
If we try to install ‘qt5-default’ from some old software repositories, then it will raise some other conflicts with some other packages that are installed in the system and finally end up with a “broken packages” error.
The 3D Visualization Tool –
Installation Requirements
- (Preferably) a Debian 11 where there will not be ‘qt5-default’ package.
- A C++ 17 compliant compiler
Minimum supported compilers:
GCC 7.3.0
or Clang 6.0.0 - CMake 3.13 or greater
- A graphics card supporting OpenGL 3.3
- Qt 5.12
- Optional: Doxygen
- And most preferably, a computer/laptop with a higher end CPU and a LOT of memory. (Because compiling NetSimulyzer will consume a lot of CPU and memory resources and may just ‘hang’ or ‘crash’ your machine — particularly around at 85% of the ‘make’ process – So if your system is only having 8GB of memory, then better configure the swap partition or .swap file properly so that the ‘make’ process will logically end with NetSimulyzer binary)
Note: This part of the installation will not require a pre-installed ns-3. (For demonstration purposes, we will only need a sample .json output from a previous 3D simulation)
Installation
Installing the dependencies
Step 1(a): Install the dependencies
Debian 11 and some latest Ubuntu distros will not have ‘qt5-default’ in their repositories. So in this case (Debian 11), the above command will end up with a package not found error.
So in that case, issue the same command without ‘qt5-default ‘
Now all the dependencies except ‘qt5-default’ will get installed in our Debian 11 system.
Step 1(b): Tricking to fake the ‘qt5-default’ installation so that the ‘make’ will succeed.
equivs-build is a program that creates Debian packages that can be used to inform dpkg about locally installed packages and their dependencies. Also, empty packages that just require other packages can be created with equivs. These can be used as “profile” packages that just mark other ones for installation.
Step 1(c): Using cat command, create a dummy package control profile for ‘qt5-default’ and save it in a folder.
Package: qt5-default
Source: qtbase-opensource-src
Version: 5.99.99+fake-13ubuntu37
Architecture: all
Depends: qtbase5-dev, qtchooser
Suggests: qt5-qmake, qtbase5-dev-tools
Conflicts: qt4-default
Section: libdevel
Priority: optional
Homepage: http://qt-project.org/
Description: Qt 5 development defaults fake package
EOF
Step 1(d): Build a dummy Debian package in the name qt5-default_5.99.99+fake-13ubuntu37_all.deb
Now we have installed all the dependencies. So we can proceed the normal installation process of NetSimulyzer.
Step 2: Install ‘git’ if needed
Installing the NetSimulyzer
Step 3: Change to a folder under which you want to install NetSimulyzer and clone the NetSimulyzer project from github.
$ git clone –recursive https://github.com/usnistgov/NetSimulyzer.git
This will create a folder ‘NetSimulyzer’ under your home directory.
Step 4: Create a folder under /home/yourname/NetSimulyzer for doing make from that folder
$ cd build
Step 5: Run cmake and specify the source directory, build type, and desired build options and then build.
$ cmake –build . –parallel
Testing NetSimulyzer
Step 5: Run the NetSimulyzer.
$ ./build/netsimulyzer
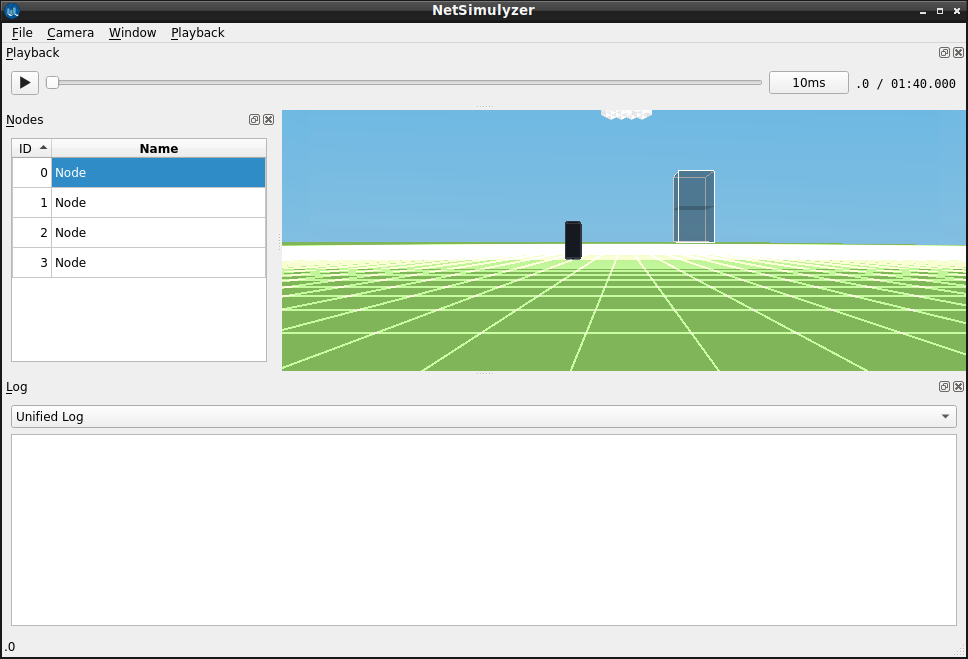
This will open the NetSimulyzer user interface from which you can load and play .jason format output 3D trace files.
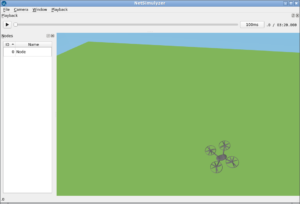
Step 6: Load and visualize a 3D Network Scenario (that was previously created during a 3D ns-3 Simulation)
In this example, the output file of the ns-3 example simulation ‘netsimulyzer-mobility-buildings-example.cc’ – ‘netsimulyzer-mobility-buildings-example.json’ has been loaded in the NetSimulyzer visualization tool. By clicking Node 0, we can ‘look’ the scenario from that node’s camera perspective.
Note:
In the following article, I explained the installation of ‘NetSimulyzer ns-3 companion module’ — which is used to generate 3D traces needed for recreating the 3D network scenarios.
Installing NetSimulyzer 3D Visualization Support Add-on Module in ns-3 under Debian/Ubuntu
The following posts show the use of NetSimulyzer.
3D Aquatic Animal Tracking Underwater Network Simulation (UWSN) Under ns-3
-
Implementation of Spring Mobility Model for ns-3 and Visualizing it in 3D along with Circle Mobility
Implementation of Spring Mobility Model for ns-3 and Visualizing it in 3D along with Circle Mobility
 Take Me to Afarion ns-3 iPlayground